Pagina's

maandag 31 maart 2014

March Madness Sale at Robyn's Fetish

THIS IS A STICKY POST 'TILL 31ST MARCH, PLEASE SCROLL DOWN FOR MY RECENT POSTS!


Hi all!

Looking for some lovely new digi stamps? Robyn's Fetish has a March Madness sale!


Hugs, Sandra

Love to Create - Color Inspiration

Hi all!

Welcome to a new challenge at Love to Create! This week we have a color inspiration challenge woth some lovely colors. Before I show you the inspirational picture, let me tell you we have an amazing sponsor. Fred She Said is offering a $15 gift certificate to the winner. Isn't that great? Just click on the banner below to go to the shop.
Fred She Said
Fre She Said also generously provided some images to the DT to work with, thanks so much. Let me show you the inspirational picture!

Aren't these colors gorgeous? This is what I created with it.
I made a 10cm (4 inch) square card with this lovely image. The image is called Magnolia and can be found here.
The image is colored with my Copic Markers, and I used the following colors.
Leaves: YG91, YG93, YG95
Petals: RV91, RV93, RV95, R00, R02, R05
As you can see I made the image in 3D, and I really like the result.
The papers I used for this card are by Cosmo Cricket. All edges are inked with Distress Ink Vintage Photo.
The pink ribbon and pearls are both from my stash.

That was it for today, I hope you like it! Please pop over to Love to Create and join us!

I would love to enter the following challenges:
Come and get it - In the garden
Sister Act Card Challenge - Anything goes
Left of Center Challenge - Ribbon and Flowers
Suzy Bee's Blooming Challenge - Spring Flowers


Hugs, Sandra

zondag 30 maart 2014

ROBYN'S FETISH CHALLENGE #205 - BIRTHDAY CARDS FOR A YOUNG CHILD

Hi all!

Welcome to a new Robyn's Fetish challenge! This week we want to see some cards for a young child!
We have a great sponsor for this challenge, Gerda's Doodles. Gerda is offering 3 images of the winners choice, isn't that generous? Just click on the banner below to take a look at her shop.
GERDA'S DOODLES

Gerda also provided some images to the DT to work with, and this is what I created.
Isn't this mouse the cutest you have seen today?  I chose to make a bright a colorful card, which many children like!
The image I used is called Cute Mouse with a Cupcake, and can be purchased here. I used my Copics to color this mouse, and I used the following markers.
Mouse: C00, C0, C2, C5
Hat: R24, R27, Y06, Y08
Cupcake: R24, R27, E13, E15, YG23, YG25
Candle: R27, Y08, YR27
Shading: W00, W1, W3
The papers I used are by Basic Grey, PB&J collection. The sentiment is from a set by Whimsy Stamps and the red ribbon is from my stash.

That was it for today, I hope you all like it. Please hop over to Robyn's Fetish and join us!

I would love to enter the following challenges
Open Minded Challenge - Animal Antics
The Doodle Garden - Anything goes
Patties Creations - Anything goes
Sister Act Card Challenge - Anything goes
Challenges 4 Everybody - Anything goes
Crafting when we can - For a child

Hugs, Sandra

woensdag 26 maart 2014

Fab 'n' Funky Challenge - Christmas

Hi all!

Welcome to a new challenge at Fab 'n' Funky! This is the last week of the month, so that means this weeks theme is CHRISTMAS!
We have an amazing sponsor this week, Bugaboo. Bugaboo is offering 7 images of the winners choice! Just click on the banner below to go to the shop.

Bugaboo generously provided some images to the DT to work with and this is what I created.

The choice of my papers is inspired by the image I used, do you see the little penguins on the paper? Aren't they adorable? The papers I used are by Jillibean Soup, and I only used some scraps for this card.
I used some regular pencils to color in the image. The image is called Winter Penguin Trio, and is available for purchase here.
I found the sentiment somewhere in my Christmas boxes, so I have no idea where it's from. Actually I didn't even know I had this stamp! The red ribbon is from my stash.

That was it for today, please visit Fab 'n' Funky and join us with your Christmas projects!

Hugs, Sandra

maandag 24 maart 2014

Love to Create Challenge - Bingo!

Hi all!

Are you ready for some BINGO? Because that is the theme of our challenge at Love to Create this week.
First let me announce our amazing sponsor this week!
StampArt Design by Kathryne is offering 5 images of the winners choice
StampArt Design by Kathryne

This is the Bingo card.


This is what I created
As you can see I chose the diagonal line, pink, lace and flowers. The papers I used are by Basic Grey, Kissing Booth collection. All papers are matted with Kraft card stock.
The image I used is generously sponsored by StampArt Design by Kathryne and she is called Lulu. You can buy this gorgeous image here. I used my Copic Markers to color the image, and I used the following.
Skin: E50, E51, E53
Hair: E21, E23, E25, E27, E29
Top: R81, R83, R85, R89
Pants: W00, W0, W2, W5
Grass: G40, G43, YG63, G46 and a green fineliner
The lace I used is a gift from my mother in law. The lace was part of her old curtains, and she wanted to dispose is, but I really wanted to have it. It's gorgeous, vintage lace.
The flowers I used are by Wild Orchid Crafts, except for the green ones. They are form my stash. The pins were from my stash.

That was it for today. Please pop over to Love to Create and join us in our bingo game!

I would love to enter the following challenges:
Artistic Inspirations Challenge - Anything goes.
Crafty Bloggers Network - Nature
Created with Love - Girly
Eureka Stamps - No square cards
The Crazy Challenge - Flower Frenzy
Wild Orchid Challenge - Spring Fling

Hugs, Sandra

vrijdag 21 maart 2014

Crea-Sandra's Crafty Tutorial World - Tying bows and knots on your card

Hi everyone!

I got a lot of people asking how I tie my bows and knots on my cards, and I that's what I am going to show you today. 

Supplies:

Ribbon
a SHARP pair of scissors, I have a special pair of scissors I only use for ribbon and fabric
Images from Robyn's Fetish
Digital papers from Robyn's Fetish
Other card making supplies as wished

Note: I did not use the actual project to make the tutorial, because it was really hard to see. I decided to use a piece of kraft card stock and polka dotted ribbon. That way you can easily see the back side of the ribbon.

When I am using ribbons on my card, I always work with a separate card front. 
If you make your card on a separate front, you will always have a clean inside.


How to make a knot.


Cut a piece of ribbon that is about 3 times the width of your card front.


Wrap it around the card front.  Do not tape it down on the back.


Make a cross with the ends of the ribbon, but make sure you also twist the ends. On the ends you should see the back of your ribbon. 
As you can see,  the left end crosses over the right and goes down.   The right end crosses the left and goes up.


Put your pinky finger on the cross and bring the bottom end up.  Cross the upper part over it.


Flip the upper part,  that you crossed over,  underneath the bottom end.


Pull at both ends.  While pulling, remove your pinky finger.


Trim off the excess ribbon and your knot is finished.


Because your knot is tied around the card front,  you can still move it.  Move it in the direction you want, and once it's in place, you can add a piece of tape at the back of the card front.


How to make a bow.


Take a piece of ribbon that is about 4 times the width of your card front.


Wrap it around the card front, and again, do not tape it down on the back.


Make a cross again, with the twisted ends, just like when you are tying a knot.


Put your pinky finger on the cross again.  Take the bottom end of the ribbon and make a loop.


Bring down the upper end of the ribbon


Wrap it around the loop, and make the bow, just like tying your shoes.


Pull at both loops to tighten the bow.


The bow is finished, but not looking really nice at this moment. You can still adjust it without redoing the bow. Just pinch in the centre and pull gently at one end. You can continue doing this until you are satisfied with the bow.


Trim off the excess ends of the ribbon and your bow is finished.
You can see why I used ribbon with a print on it, so you can see the front on the back. When you are being very careful, you can twist the loops while adjusting the bow, so you can see the "good" side of the ribbon. When you are using regular ribbon, like the satin ribbon I used in my samples, you do not have to do that, because you don't see the difference.


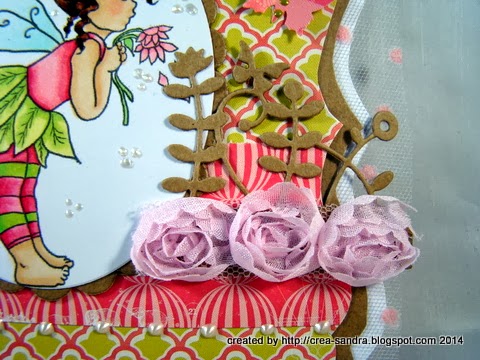
Here are the finished cards I made.


That was it for today, I hope you like it. It requires some practicing, but once you get it, it's pretty easy!

Sandra


Digi Haven Challenge - Things with wings.

Hi all!

Time for a new challenge at Digi Haven! This fortnight we want to see things with wings!
Our sponsor for this challenge is Whoopsi Daisy, and they are offering 1 image sheet of the winners choice. Just click on the banner below to go to their shop.
http://linnie-whoopsiedaisy.blogspot.com/

Whoopsi Daisy also generously offered some images to the DT to use, and this is what I created.
The shape of the card is created with a Dutch Doobadoo template. I love the one I already have and I can't wait to buy some new ones to play with! The papers I used are by My Minds Eye. Between the cardbase and the first layer I added some pink polka dotted tulle from my stash.
The image I used is from sheet 199, and can be found here. I used my Copic Markers to color her, and I used the following markers:
Skin: E50, E51, E53 and R20 for blush
Hair: E23, E25, E27, E29
Clothes: RV21, RV23, RV29, YG00, YG03, YG06
Wings: BG0000, BG000, BG10
I used an oval die to cut out the image and I matted it with a scalloped oval. I also added little pearls I made with a pearlmaker pen.
The die-cut I used is by Memorybox. The rose lace is from my stash.
To finish my card I punched some butterflies and added some green pearls in the centres.

That was it for today, I hope you like it. Now pop over to Digi Haven and show us your things with wings!
Hugs, Sandra

woensdag 19 maart 2014

Divas by Design - Flower Power

Hi all!

Time for a new challenge at Divas by Design! This weeks theme is one close to my heart, FLOWER POWER! Well, for someone who is known for her flower bouquets it's not that hard right?
Anyway, we have a fabulous sponsor the week, Live and Love Crafts. Just click on the banner below to go to the shop.


This is what I created for the challenge.
I used a sketch from Tiets to make this card, and I really like how it turned out.
sketch+febr+2014 af…
The image I used for this card is called Rose Red, by Saturated Canary. I have her both as a digital image and as a rubberstamp, and I soooo love her! She is not available as a digi anymore, but you can always buy the rubberstamp, right?
I used my trusted Copic Markers again to color the image, and I used the following.
Skin: E000, E00, E21, E13 and R20 for blush
Hair: E11, E13, E15, E18, E29
Eyes: BG72, BG75
Dress: BG72, BG75, BG78, BG90, BG93, BG96, BG99
Tree: E18, E29, G43, G46
Nest: E13, E15
Bird: Y21, Y28
Eggs: E40, E41
The papers I used are by Basic Grey, Serenade collection. All edges are inked with Distress Ink Vintage Photo. The sentiment I used is by Whimsy stamps. The pearls were actually white, but I used my BG75 Copic Marker to make them match my papers.

The flowers I used are from Wild Orchid Crafts, except from the white ones. Those are in my stash for ages, and I have absolutely no idea where they are from.

That was it for today, now hop over to Divas by Design, and show us your flower power!

I would love to enter the following challenges:
Fan-Tastic Tuesday - Anything goes
Cuttin and Stamping - Green, Blue, Red (hair), Yellow and Teal
The Crazy Challenge - Flower Frenzy
Challenges 4 Everybody - Anything goes
613 Avenue - Anything goes with 2D/3D flowers
The Doodle Garden - Anything goes
Emergency Crafters - Flowers
Digi Galore - Anything goes
Copic Marker Spain - Anything goes
ABC-Challenge - H is for Hair


Hugs, Sandra

maandag 17 maart 2014

NEW ST.PATRICK’S DAY AND EASTER IMAGES AT THE ROBYN’S FETISH DIGITAL STAMPS AND MORE STORE

Hi all!

Happy St. Patrick's Day!

Welcome to a new release of St. Patrick's Day and Easter images at Robyn's Fetish! Retta has designed some fabulous new images that are being released today! Isn't that great? I have made some samples with some of the new images, that I would like to show you!

First, here is a sample I made with Seamus O Dougal. I also used Pot of Gold from this new release on my card. I made a 4inch square card and I used no designer paper at all! I used a piece of white card stock and ran it through my Cuttlebug with an Old Script embossing folder. The I used some Distress Ink Shabby Shutters and Vintage Photo. I used my Copic Markers to color the images and I used the following markers:
Pot of Gold: C5, C7, 100, Y35, Y38
Seamus O Dougal: E000, E00, E11, R20, YR23, YR27, G00, G02, G05, G07

For the next sample I used an image called Four Leaf Clover and Pot of Gold. The papers I used to create this sample are by BoBunny, and I only used some scraps for this card. The sentiment I used is by Nicole Verkooijen and says Good luck, you can do it! I used regular coloring pencils to color the image.


The last sample I made is with Easter Egg Tree. The papers I used for this card are by My Minds Eye. All edges are inked with Distress Ink Vintage Photo.
I used Copic Markers again to color the image: E57, Y21, Y28, BG05, BG07 and a white gelpen.

That was it for now, please pop over to the Robyn's Fetish Challenge blog to see the rest of the images, and don't forget that all images are available at the Robyn's Fetish store!

Hugs, Sandra