This is a sticky post and will stay on top until December 31st. Please scroll down for my other posts!
Hi all!
Robyn's Fetish is having a Christmas Sale, 40% off all items in store until December 31st! You don't want to miss this! Just click on the badge to go to the store directly!
Hugs,
Sandra


dinsdag 31 december 2013

zondag 8 december 2013
ROBYN'S FETISH CHALLENGE #189 - must have a bow on it
Hi all!
Welkome to a new challenge at Robyn's Fetish! This challenge is an easy one, everything it allowed, as long as you have a BOW on it.
Fir this challenge we are sponsored by Dragonsmoore, and they are offering 5 images of the winters choice. Isn't that generous! Just click on the banner below to go to their shop.

Dragonsmoore also generously offerde some images to the DT to work with and this is what I creaties with it.

I used some kraft card stock as a base, and used an embossingfolder to create some texture. On the rausde party's I sponged some Whisper White ink. to make it look like falling show.

The image is colored with my Copic Markers, and I used the following markers.
Hedgehog: E23, E25 and E27
Gift: G43, G46
Hat: R24, R27 and R29
I also used some Stickles on the hat band.

The sentiment I used is by Imaginisce and stampend with Versamark Ink. I used some silver embossingpowder and heatembossed it.
I used a scrap design papier from my stash and some twinr that I tied in a bow.
That was it for today, I hope you like it. Now hop over to Robyn's Fetish and join us for chance to win the awesome prize!
Hugs Sandra
vrijdag 6 december 2013
Digi Haven - Christmas!
Hi all!
Welcome to a new challenge at Digi Haven!
Holiday season is approaching quickly, did you already set up your tree? I haven't yet, but that will happen when hubby gets home! He has to carry everything downstairs as it is too heavy for me to carry with the big belly! This fortnight's challenge theme is CHRISTMAS and did I already mention we have an amazing sponsor for this one?
Bugaboo is offering a $21 gift certificate for the randomly chosen winner, so you'd better be joining us! Just click on the banner below to go to their shop!

Bugaboo also generously offered some images to the DT to work with and this is what I created.
 I really love these snowmen peeking through the window, and I HAD to make a windowcard with it.
 Not sure if it shows up in the pics, but my I did some clear heat embossing on the front, that is why it is a bit warped. I didn't use any dessin paper at all, which is really rare for me! Usually I use lots of it, but I actually quite like the result.
 The image is called Snow Friends Window and as said before it is generously sponsored by Bugaboo. You can find the image here. I used my trusted Copic Markers to color the image, and I used the following.
Snow: BG0000, BG000, BG10
Greens: G43, G46
Reds: R24. R27, R29
Blacks: C3, C5, C7
Orange: YR68
Window frame: E71, E74, E77, E79
I also used some Icicle Stickles on the background
 The sentiment I used is by AmyR and is stamped with Stampin Ups Cherry Cobbler ink. To finish my card I used some red/white twine and a snowflake charm.
That was it for today, I hope you like my card. Now hop over to Digi Haven and join us!
Hugs, Sandra
Welcome to a new challenge at Digi Haven!
Holiday season is approaching quickly, did you already set up your tree? I haven't yet, but that will happen when hubby gets home! He has to carry everything downstairs as it is too heavy for me to carry with the big belly! This fortnight's challenge theme is CHRISTMAS and did I already mention we have an amazing sponsor for this one?
Bugaboo is offering a $21 gift certificate for the randomly chosen winner, so you'd better be joining us! Just click on the banner below to go to their shop!
Bugaboo also generously offered some images to the DT to work with and this is what I created.


Snow: BG0000, BG000, BG10
Greens: G43, G46
Reds: R24. R27, R29
Blacks: C3, C5, C7
Orange: YR68
Window frame: E71, E74, E77, E79
I also used some Icicle Stickles on the background

That was it for today, I hope you like my card. Now hop over to Digi Haven and join us!
Hugs, Sandra
zondag 1 december 2013
ROBYN'S FETISH CHALLENGE #188 - CHRISTMAS CARDS
Hi all!
Wow, did you realize that today is December 1st? Time really does fly, doesn't it? Did you already finish your Christmas cards? Well, if not, this weeks challenge theme at ROBYN'S FETISH is another great excuse to make one, because we want to see some CHRISTMAS CARDS!!!
We also have a fabulous sponsor for this weeks challenge, Robyn's Fetish. Robyn is offering 3 digital image of the winners choice, isn't that generous! Just click on the banner below to go to the shop.

Robyn also generously provided some images to the DT to work with, thank you very much for that!
This is the card I made for this weeks challenge.
 I made a 5" square card, I really love using that size. The papers I used are by My Minds Eye.
Let me show you a close up of the colored image.
 The image I used is called Mouse with Christmas Cookie and can be found here. I used my Copic Markers to color the image, and I used the following markers.
Mouse: C00, C0, C2, C5 and R20 for the inside of the ears.
Hat and scarf: R24, R27, R29
Sweater: G43, G46
Boots: E23, E25, C5
Cookie: E23, G43, R27
I also used some Crystal Stickles on the band of his hat and mittens, but it didn't really show on camera.
 I created my sentiment by using 2 different stamps from the Noor!Design Bingo Cards set. They are both stamped with Versamark ink and heat embossed with white embossing powder.
 The red ribbon I used is from my stash and I tied it in a bow. I also used some buttons from my stash to finish my card.
That was it for today, I hope you like my card. Now hop over to the Robyn's Fetish Challenge blog and join us with your Christmas Cards!
Hugs, Sandra
Wow, did you realize that today is December 1st? Time really does fly, doesn't it? Did you already finish your Christmas cards? Well, if not, this weeks challenge theme at ROBYN'S FETISH is another great excuse to make one, because we want to see some CHRISTMAS CARDS!!!
We also have a fabulous sponsor for this weeks challenge, Robyn's Fetish. Robyn is offering 3 digital image of the winners choice, isn't that generous! Just click on the banner below to go to the shop.
Robyn also generously provided some images to the DT to work with, thank you very much for that!
This is the card I made for this weeks challenge.

Let me show you a close up of the colored image.

Mouse: C00, C0, C2, C5 and R20 for the inside of the ears.
Hat and scarf: R24, R27, R29
Sweater: G43, G46
Boots: E23, E25, C5
Cookie: E23, G43, R27
I also used some Crystal Stickles on the band of his hat and mittens, but it didn't really show on camera.


That was it for today, I hope you like my card. Now hop over to the Robyn's Fetish Challenge blog and join us with your Christmas Cards!
Hugs, Sandra
zondag 24 november 2013
ROBYN'S FETISH CHALLENGE #187 - VINTAGE STYLE
Hi all!
Welcome to a new challenge at Robyn's Fetish!
This weeks theme is a real challenge for me, we want to see some VINTAGE style cards. Since my style is a bit more colorful and bright, I always have a hard time doing vintage, even though I love doing it.
For this challenge we have an awesome sponsor, Create with TLC. Just click on the banner below to go to their shop. They are offering a $12 gift certificate for the randomly chosen winner.

Create with TLC also generously provided some images to the DT to work with, and this is what I created.
 Pretty vintage, right? The papers I used are from the Euro-shop, and all edges are inked with Distress Ink Vintage Photo. Let me show you a close-up of the colored image.
 I used my Copic Markers to color the image, and I used the following markers.
Skin: E51, E53
Hair: E74, E77
Greens: YG63, YG67
Pinks: RV91, RV93, RV95
I used one of my Nestabilities Diamond dies to cut out the image.
 The flowers I used are by Prima Marketing and they were in my stash for ages. The lace I used is also really old, my mother-in-law gave it to me. It used to be the trim of her curtains, and it's about 30 years old. Now that is what you call vintage, right!
That was it for today, now hop over to Robyn's Fetish and join us with your vintage projects!
Hugs, Sandra
Welcome to a new challenge at Robyn's Fetish!
This weeks theme is a real challenge for me, we want to see some VINTAGE style cards. Since my style is a bit more colorful and bright, I always have a hard time doing vintage, even though I love doing it.
For this challenge we have an awesome sponsor, Create with TLC. Just click on the banner below to go to their shop. They are offering a $12 gift certificate for the randomly chosen winner.

Create with TLC also generously provided some images to the DT to work with, and this is what I created.


Skin: E51, E53
Hair: E74, E77
Greens: YG63, YG67
Pinks: RV91, RV93, RV95
I used one of my Nestabilities Diamond dies to cut out the image.

That was it for today, now hop over to Robyn's Fetish and join us with your vintage projects!
Hugs, Sandra
vrijdag 22 november 2013
Digi Haven DT - Thanks or Thanksgiving
Welcome to a new fortnightly challenge at Digi Haven! We have a very fitting theme for this challenge. We want to see your Thanks or Thanksgiving cards!
We also have a fabulous sponsor for this challenge, Beccy's Place!
Just click on the banner below to go to her shop!
 http://www.beccysplace.com/
Beccy is also generously offering 3 images to the randomly chosen winner, isn't that fabulous! You'd better be joining us!!
This is what I created for this challenge.

The image is called Peonies in a vase and can be found here.

Peonies: R20, R22, R24
Leaves: YG91, YG93, YG95
Vase: W00, W1
Water: BG0000
I used my oval dies to cut out the image, and matted it with a scalloped oval.

That was it for today, I hope you all like it! Now hop over to Digi Haven and join us!
Hugs, Sandra
vrijdag 8 november 2013
Digi Haven - Fall
Hi all!
Time for a new challenge at Digi Haven! We want to see some FALL-themed projects!
We also have a fabulous sponsor for this challenge, Floppy Latte! Floppy Latte is offering $6 gift certificate to the randomly chosen winner! Isn't that awesome?
Just click on the banner below to go to the shop!

Floppy Latte also generously provided some images to the DT to work with, and this is what I created with it.
 I made a card using some scraps I had left. The papers are by My Minds Eye, and by using the scraps, there is nothing left of this paperpad... Guess I will have to buy me a new one! :)
The image is by Floppy Latte, and can be found here.
I used a Nestabilities die to cut out the sentiment.
All edges are inked with Distress Ink Vintage Photo. The buttons I used are from my stash, and so are the ribbons.. The flowers are by Prima Marketing and Marianne Design, and were the perfect fall colors!
That was it for today, I hope you all like it! Now hop over to Digi Haven and join us with your fall project!
Hugs, Sandra
Time for a new challenge at Digi Haven! We want to see some FALL-themed projects!
We also have a fabulous sponsor for this challenge, Floppy Latte! Floppy Latte is offering $6 gift certificate to the randomly chosen winner! Isn't that awesome?
Just click on the banner below to go to the shop!
Floppy Latte also generously provided some images to the DT to work with, and this is what I created with it.

The image is by Floppy Latte, and can be found here.
I used a Nestabilities die to cut out the sentiment.
All edges are inked with Distress Ink Vintage Photo. The buttons I used are from my stash, and so are the ribbons.. The flowers are by Prima Marketing and Marianne Design, and were the perfect fall colors!
That was it for today, I hope you all like it! Now hop over to Digi Haven and join us with your fall project!
Hugs, Sandra
zondag 3 november 2013
Robyn's Fetish Challenge 184 - Thanksgiving
Hi all!
Welcome to a new challenge at Robyn's Fetish! This is the first DT-sample I created for Robyn's Fetish since my absence, so I hope you all like it!
This week we want to see your THANKSGIVING projects! We are sponsored by Robyn's Fetish and Robyn is kindly offering 3 digi's of the winners choice! Thanks Robyn!
Just click on the banner below to go directly to the shop.

The image I used for my card is also generously sponsored by Robyn's Fetish and is called Cornucopia. You can find the image here.

 I used my Nestabilities die to cut the image, and I used some Distress Ink Vintage Photo on the edges.
 The papers I used are by Prima Marketing, and I also inked the edges of my papers. The lace is really vintage. It was a gift from my mother-in-law and it used to be lace from her curtains from about 40 years back. I also used some flat-backed pearls from my stash.
That was it for today, I hope you all like it. Now hop over to Robyn's Fetish and show us your Thanksgiving projects!
Hugs, Sandra
Welcome to a new challenge at Robyn's Fetish! This is the first DT-sample I created for Robyn's Fetish since my absence, so I hope you all like it!
This week we want to see your THANKSGIVING projects! We are sponsored by Robyn's Fetish and Robyn is kindly offering 3 digi's of the winners choice! Thanks Robyn!
Just click on the banner below to go directly to the shop.
The image I used for my card is also generously sponsored by Robyn's Fetish and is called Cornucopia. You can find the image here.

Notice the difference in my card? I usually color with my trusted Copic Markers, but this time I used my coloring pencils! Let me show you a close-up of my colored image!


That was it for today, I hope you all like it. Now hop over to Robyn's Fetish and show us your Thanksgiving projects!
Hugs, Sandra
vrijdag 25 oktober 2013
Digi Haven Challenge - Orange and Black!
Hi all!
Welcome to my very first creation since my absence (see previous post), and welcome to a new Digi Haven Challenge! It is the season for some orange and black, so why not use that as a challenge theme?
We also have a fabulous sponsor for this challenge, Broken Box Stock and they are offering 3 image of the winners choice! Just click on the banner below to take a look at their shop!

They also provided some images for the DT to work with, but I went with their freebie. This is my project.
 Some of you might know I am a paper hoarder, and believe it or not, I didn't have any Orange/Black designer paper. Shocking huh? I decided to make my own. I used some orange cardstock, some Rusty Pickle Rub-ons, AmyR Autumn sentiments, Versafine Onyx Black ink and a black and a white pearlmaker pen, and VOILA! Homemade designer paper! Used some ribbon from my stash to finish it off.
 Like I said, the lollipop image I used is a freebie and can be found hereI used an orange and a black marker for the lollipop, a grey one for the stick and an orange pencil for the bow. I also coated the lollipop with some Glossy Accents to make it look sugarsweet, but it doesn't show very well on the picture.
That was it for today, so hop over to Digi Haven and join us with your orange and black cards!
Hugs, Sandra
Welcome to my very first creation since my absence (see previous post), and welcome to a new Digi Haven Challenge! It is the season for some orange and black, so why not use that as a challenge theme?
We also have a fabulous sponsor for this challenge, Broken Box Stock and they are offering 3 image of the winners choice! Just click on the banner below to take a look at their shop!
They also provided some images for the DT to work with, but I went with their freebie. This is my project.


That was it for today, so hop over to Digi Haven and join us with your orange and black cards!
Hugs, Sandra
woensdag 23 oktober 2013
Sorry for the long absence!
Hi All!
It has been a really long time since I last posted on my blog, and let me try to explain what was going on in my life.
Last year I got married with the love of my life, and we decided we would love to extend our family with a baby. On May 21st of this year I found out I was pregnant, and I was super excited.
That excitement didn't last really long, because I got the well known morning sickness. At first it wasn't that bad, and I thought it would pass after 12 weeks. When I passed the 11 weeks pregnant, I was so nauseous I couldn't eat or drink anything without throwing up. As a result I got completely dehydrated and I was taken into hospital.

I got an iv with fluids and after one week I was recovered and went home. After that I hoped I could finally starting to enjoy being pregnant. Except I got a throwback and had to go to the hospital for the second time.
The doctors decided only and IV wasn't enough so they gave me a feeding tube, but it didn't help.
This went on and on for two more weeks, and then all of a sudden I started giving up some blood. The ambulance picked me up, and they rushed me to the ER, and after some research and a gastroscopy (hell, truly...) they found out all throwing up had caused a little wound inside my stomach and well, there I was again, back in hospital. The nurses were really lovely, and when I finally started to feel better I made some jokes with them. I finally thought I was cured from that darn nausea.
After a week I had a regular check-up at the gynecologist and she saw I wasn't doing good. She wanted to check me again and she concluded I was dehydrated AGAIN.
They were shocked I was still walking around. Anyway, back on the darn IV and feeding tube again. This time the feeding tube worked, and after one week I went home again, with my new best friend, feeding tube...
All this happened in about six weeks, and it really exhausted me. At home I finally started to sleep better and I tried to recover as much as I can. I still wasn't allowed to eat, only drink about half a liter of water a day. I did that until the end of September, 24/7.
 Me and my best friend FEEDING TUBE
On my birthday, September 29th I started eating again, and I only used the feeding tube at nights. This went really good, and two weeks ago I got the best news I had since finding out being pregnant.
THE FEEDING TUBE WAS REMOVED!!! I can eat and drink myself again, without throwing up!
Luckily the baby never felt a thing about what happened to me, and he/she is doing sooooo good. The growth of the baby is perfect and my belly is getting pretty big!

I am feeling really good at the moment and I never thought I could say it BUT I LOOOVVVEEE BEING PREGNANT!
At this moment I am 27 weeks pregnant, so only 13 more weeks to go. I am really curious what the baby would look like, and whether it's a boy or a girl. We don't know that, and we don't want to know it, but still pretty curious!
Thanks everyone for being patient with me, and still being my follower!
Hugs, Sandra
It has been a really long time since I last posted on my blog, and let me try to explain what was going on in my life.
Last year I got married with the love of my life, and we decided we would love to extend our family with a baby. On May 21st of this year I found out I was pregnant, and I was super excited.
That excitement didn't last really long, because I got the well known morning sickness. At first it wasn't that bad, and I thought it would pass after 12 weeks. When I passed the 11 weeks pregnant, I was so nauseous I couldn't eat or drink anything without throwing up. As a result I got completely dehydrated and I was taken into hospital.
I got an iv with fluids and after one week I was recovered and went home. After that I hoped I could finally starting to enjoy being pregnant. Except I got a throwback and had to go to the hospital for the second time.
The doctors decided only and IV wasn't enough so they gave me a feeding tube, but it didn't help.
This went on and on for two more weeks, and then all of a sudden I started giving up some blood. The ambulance picked me up, and they rushed me to the ER, and after some research and a gastroscopy (hell, truly...) they found out all throwing up had caused a little wound inside my stomach and well, there I was again, back in hospital. The nurses were really lovely, and when I finally started to feel better I made some jokes with them. I finally thought I was cured from that darn nausea.
After a week I had a regular check-up at the gynecologist and she saw I wasn't doing good. She wanted to check me again and she concluded I was dehydrated AGAIN.
They were shocked I was still walking around. Anyway, back on the darn IV and feeding tube again. This time the feeding tube worked, and after one week I went home again, with my new best friend, feeding tube...
All this happened in about six weeks, and it really exhausted me. At home I finally started to sleep better and I tried to recover as much as I can. I still wasn't allowed to eat, only drink about half a liter of water a day. I did that until the end of September, 24/7.
Me and my best friend FEEDING TUBEOn my birthday, September 29th I started eating again, and I only used the feeding tube at nights. This went really good, and two weeks ago I got the best news I had since finding out being pregnant.
THE FEEDING TUBE WAS REMOVED!!! I can eat and drink myself again, without throwing up!
Luckily the baby never felt a thing about what happened to me, and he/she is doing sooooo good. The growth of the baby is perfect and my belly is getting pretty big!
I am feeling really good at the moment and I never thought I could say it BUT I LOOOVVVEEE BEING PREGNANT!
At this moment I am 27 weeks pregnant, so only 13 more weeks to go. I am really curious what the baby would look like, and whether it's a boy or a girl. We don't know that, and we don't want to know it, but still pretty curious!
Thanks everyone for being patient with me, and still being my follower!
Hugs, Sandra
zondag 23 juni 2013
Robyn's Fetish Challenge 165 - Pink, Scallopes, A border and a bow
Hi all!
Welcome to a new challenge at Robyn's Fetish! This week we have a recipe challenge, and even though that is not one of my favorites, this one was pretty easy though!
What is the recipe, you ask? Well, PINK, SCALLOPES, A BORDER AND A BOW!
Told you it was easy!
We also have a fabulous sponsor this week! We are sponsored by Digi Stamp Characters, and they are offering 3 digi stamps of the winners choice from her Etsy shop or her homepage!

Digi Stamp Characters also generously sponsored some images to the DT to work with and this is what I created.
 I made a scalloped round easelcard, and I used my Nestabilities dies for it.
 The image I used is called Pure Innocence 030, and can be found here. I used regular coloring pencils to color my image, and some liquid pearls for the background.
 The designer paper is shocking pink, from a My Minds Eye Paper Pad. I also used a piece of green designer paper to make a border. The pink ribbon I used is from my stash, and I made a bow with it.
That was it for today, I hope you all like it! Now hop over to Robyn's Fetish and join us!
Hugs, Sandra
Welcome to a new challenge at Robyn's Fetish! This week we have a recipe challenge, and even though that is not one of my favorites, this one was pretty easy though!
What is the recipe, you ask? Well, PINK, SCALLOPES, A BORDER AND A BOW!
Told you it was easy!
We also have a fabulous sponsor this week! We are sponsored by Digi Stamp Characters, and they are offering 3 digi stamps of the winners choice from her Etsy shop or her homepage!

Digi Stamp Characters also generously sponsored some images to the DT to work with and this is what I created.


That was it for today, I hope you all like it! Now hop over to Robyn's Fetish and join us!
Hugs, Sandra
Robyn's Fetish is sponsoring Cupcake Inspirations Challenge - GDT post
Hi all!
Robyn's Fetish is sponsoring Cupcake Inspirations for its current challenge, and I was asked to be their Guest Designer on behalf of Robyn's Fetish.
This is the inspirational pic for this challenge


Robyn's Fetish is sponsoring Cupcake Inspirations for its current challenge, and I was asked to be their Guest Designer on behalf of Robyn's Fetish.
This is the inspirational pic for this challenge

It is a color challenge, and this is the project I made.

I made a little gift bag in the required colors.
The image I used is by Robyn's Fetish and is called Daisy Days, and can be found here.
I used my Copic Markers to color the image and I used the following markers.
Skin: E50, E51, E53
Hair: E27, E29
Pinks: R81, R83, R85
Turquoise: BG11, BG13, BG15
Lavender: BV02, BV04, BV08
I made a little tag for the sentiment and I used some bakers twine to attach it to the handle of the bag.
That was it for now, I hope you like it.
Now pop over to Cupcake Inspirations and join them!
Hugs xx Sandra
vrijdag 21 juni 2013
Crea-Sandra's Crafty World Tutorial at Robyns Fetish - Arranging flowers on a card
Hi all!
This is the tutorial I made for Robyn's Fetish today!


This is the tutorial I made for Robyn's Fetish today!
Welcome to a new tutorial, I am going to show you how I arrange paper flowers on my cards.
Supplies
Paper flowers in different sizes. I used gardenias, cherry blossoms, lilies, roses and rosebuds.
Tim Holtz scissors
Tacky glue
Designer paper, I used My Minds Eye
Robyn's Fetish image Ms. Cutie Bear
Kraft card stock
Card base from white card stock
Distress Ink
Lace

Score and fold your card base in half
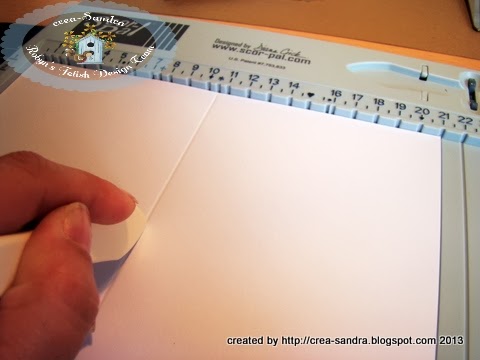
Cut a piece of kraft card stock slightly smaller than your card base. I usually cut 1/8 inch smaller

I cut 5 pieces of designer paper to cover up the kraft card stock

If you want, this is the moment to distress the edges of your papers. I like to use Distress Ink Vintage Photo for this, because the color matches the designer paper I used. After inking, you can adhere the papers to the kraft piece. Do not adhere it to the card base yet.

Cut a piece of lace and wrap it around the card front.

I always use some acid free tape to adhere my lace to the back of my card front.

Color your image and cut it out.

I used my Copic Markers to color the image and I used the following markers.
Bear: E21, E23, E25, E27
Dress: BG11, BG13, BG15
Flowers: R20, R22, R24
Stems: G43, G46

I adhered the image to a piece of kraft card stock and adhered that to the card front with dimensional adhesive. I also adhered the card front to the card base. If you adhere your flowers to the card front first, it might be hard to adhere the front to the base, so I like to glue them together now.

Pick the flowers you want to use. I usually use one big flower as a center piece, and let the size go down. That is why I started with the gardenia, because it is the biggest flower.

I always use my Tim Holtz scissors to snip the stems off my flowers. Removing them is the easiest way to adhere the flowers to your card.

Personally I like symmetry in my flower piece, so I came in with some cherry blossoms because they are a bit smaller than the gardenias. Next to the cherry blossoms I used some lilies.
While snipping the stems, I always lay the flowers down on my card so I can see what I need next.

To finish my flower piece, I like to give it some length. I used some closed rosebuds for this but you can also use some tulips for it.

I always use two rosebuds on each side, because they are a bit small. By using the stems in different lengths, you can create some more dimension to it.

When I am happy with the result I start adhering the flowers to my card. I always use Tacky Glue for it, because it dries fast and your flowers will never come loose. You don't have to use a big amount of glue, just a little dot is enough.

When adhering a flower, I like to press it down for about five seconds to make it stick really good.

Before I adhere the cherry blossoms, I like to squeeze them a bit, so there are no gaps between the gardenia and the cherry blossom.

For the lilies, I used some glue on one of the petals so they can be adhered to the card more easily.

After adhering the lily, it looks like this.

Now it's time to adhere the closed rosebuds. I like to cover the stems in glue so they stay in place.

Now you can finish the other side of the flower piece.

This is how my card looks at this moment. I think the bottom right corner looks a bit plain. I am not happy with how it looks. This shows you that you need some balance in your card and that is why I am going to add some flowers to the bottom right corner.

When creating a second flower piece, I never make it as big as the main piece. Usually I don't use more than three flowers. I lay them down first to see how it looks before adhering them.

When I am happy with the result, I adhere the flowers to the card. In this picture you can see that I didn't use two lilies. I replaced one with a little rose.

Now let me show you the result of the card.

I hope this gave you a good impression on how to arrange flowers on your card. I know there are probably a million ways to arrange them but I like this the most.
Thanks for stopping by! I hope you give it a try!
Sandra
Abonneren op:
Posts (Atom)