Pagina's

donderdag 30 mei 2013

Friends Forever - Aud Sentiments DT Post

Hi all!

We are already halfway in our current challenge at Aud Sentiments. We want to see some projects with the word FRIEND in the sentiments.

We are sponsored by the fabulous StampArt Design by Kathrine, just click on the banner below to go to the shop!


Our sponsor also provided images for us DT to work with and this is what I created!
The colors are quite different than I usually use, but I like how it turned out! The image I used is called Gracie, and can be found here.
Gracie is colored with my Copic Markers and I used the following.
Skin: E50, E21, E13
Hair: E40, E41, E43, E47 and E49
Dress: R14, R17, Y35, Y38
Fence: E47, E49
Grass: YG03, YG06, YG09
The sentimemt I used is by AmyR. I absolutely adore her sentiment sets. I recently had the chance to buy 6 of her sets, and they are perfect!! I used Versamark Onyx Black ink to stamp the sentiment on some kraft cardstock and cut a little banner from it.

The papers I used are by Echo Park. I handstitched a black border around the paper, and I used a StampinUp! piercing template as a guide.
To finish my card I made some flower clusters and the leafs are punched with a Martha Stewart punch.

That was it for today, I hope you all like it! Now hop over to Aud Sentiments and show us your FRIEND-sentiments!!


Hugs, Sandra

zondag 26 mei 2013

Robyn's Fetish Challenge #161 - Birds

Hi all!

A new Sunday means a new challenge at Robyn's Fetish and this week we want to see some BIRDS!!!! Not that hard, isn't it?

We have a fabulous sponsor for this challenge, Fred She Said! They are offering a $10 gift certificate for the winner, how generous is that!
Just click on the banner below to go to their shop!
Fred, She Said Designs

Fred She Said also generously sponsored images for the DT to work with, and this is what I created.
The image I used is called Wee Hummingbird and Petunias and can be found here.
The image is colored with my Copic Markers, and I used the following markers.
Petunias: R81, R83, R85
Leafs: G43, G46
Hummingbird: BG01, BG05, BG09 and YR27 for the beak.
The images is cut out with my Nestabilities Labels Four die.
The papers I used are by My Minds Eye. The sentiment I used is by Noor!Design. Those are my favorite sets, I just love them!
Ok, I am sorry, I just couldn't help myself! I had to make a flower bouquet, because I bought some gorgeous Gardenia Flowers!
The flowers I used are by Wild Orchid Crafts.
I also used some wooden birds to finish my project.

That was it for today, I hope you like it! Now hop over to Robyn's Fetish and join us!!

Hugs, Sandra

Poodlicious birthday - Red Carpet Studio

Hi all!!

Time for the Card Design Team from Red Carpet Studio to host a new challenge!! This week we are inspired by the movie Sixteen Candles, and guess what, we want to see some birthday cards! You didn't see that one coming, right :)

Anyway, we also have a great sponsor for this challenge, we are sponsored by Paper Pretties! They are offering 6 digi sets to the lucky winner! Just click on the banner below to go to their shop!
3


Paper Pretties also generously provided some images for us DT to work with, and this is what I created.
I made a cute girly card with the poodle and the matching sentiment. The poodle can be found here, and the sentiment is included.
As soon as I saw this image I knew I wanted to color the poodle pink, but I am actually happy I did some white/grey areas too! I used my Copic to color the image and I used the following markers
Poodle: W00, W0, W2, W5, R81, R83, R85
Cupcake: G43, G46, BG11, BG13, BG15
Candle: G43, R85, YR23
The papers I used are by My Minds Eye. I used a border punch to create a border and the twine is from my stash. I wrapped the twin all over the card for some texture.
The pink ribbon I used is also from my stash, and tied in a bow.

That was it for today, I hope you like it! Now pop over to Red Carpet Studio and join us with your birthday cards!

Hugs, Sandra

vrijdag 24 mei 2013

You've changed my world - Digi Haven DT

Hi all!

It is time for a new challenge at Digi Haven, and we have one of my favorite themes for this fortnight! We want to see BUTTERFLIES!!!

We also have a fabulous sponsor for this challenge, Floppy Latte! The winner receives a $6,- voucher to spend in the store!
Just click on the banner below to go to the shop.


The images used by the DT are also generously sponsored by Floppy Latte, and this is what I created.
Told you this was my favorite theme!! Just love the image and the Tim Holtz Butterfly die!
The image I used is called Butterflies and Flowers, and can be found here. The image is colored with my Copic Markers, and I used the following.
Flowers: RV91, RV93, RV95
Leafs: YG91, YG93, YG95
Butterflies: V000, V01, V22, V28 W3, W5
The die I used is by Tim Holtz, and cut out twice. Once from kraft card stock and once from patterned paper.
The sentiment I used is by Noor!Design, stamped with Versafine ink.
The patterned paper I used is by Authentique, and I fussy cut the flowers from one of the papers.
The edges of my papers are inked with Distress Ink Vintage photo.

That was it for today, now hop over and join us at Digi Haven. Don't forget to spread some love to my DT-mates!

Hugs, Sandra

zondag 19 mei 2013

Robyn's Fetish Challenge #160 - Four-Legged Friends

Hi all!

New Sunday, new challenge at Robyn's Fetish! This week we want to see some projects with
FOUR-LEGGED FRIENDS!  A dog, cat, rabbit, or whatever animal has four legs!

We also have a fabulous sponsor for this challenge, it's Oak Pond Creations! They are offering 3 images to the winner! Just click on the banner below to go to the shop!
OAK POND CREATIONS
Oak Pond Creations also generously sponsored the images for the DT to work with, and here is my project!

From the moment I saw this image I fell in love, and you know what?  I am truly anxious about frogs! They scare the life out of me! I once accidentally stepped on a frog and I think my mom, who lives 10miles away from me, was able to hear me screaming! But yet, I do LOVE this image!
The image is called Flower Pot Frog and can be found here. He is colored with my Copic Markers and I used the following.
Potting soil bag: E55, E57, E59
Flower pot: E51, E53, E55
Frog: G43, G46
Shovel: E51, E53, BG11, BG13, BG15
I also used Glossy Accents on the frogs eyes.
The sentiment I used is by Noor!Design, and stamped with Versafine Onyx Black Ink. I just recently bought it, and I love to use it with sentiment stamps, it is great for details! The fence and the birdhouse are made with a Creatables die, and the embossed parts are inked with Distress Ink Brushed Corduroy.
The papers I used are by BoBunny. All edges are inked with Distress Ink too. The banner is made with a die from Noor!Design. I used some blue twine to make a banner. I used some pearls from my stash to finish it off.

That was it for today, I hope you all like it! Now pop over to Robyn's Fetish and show us some four-legged friends!

Hugs, Sandra

zaterdag 18 mei 2013

Congratulations - Drunken Stampers DT post


Hi all!

Time for a new challenge at Drunken Stampers, hosted by team Bahama Mama's!
This challenge is all about the movie STAR WARS, so we want to see some rockets, et cetera!
DS128
Not really hard, isn't it!

I made a card with an image from The Stamping Chef, I really love Tamara's images! This one is called Lift Off, and can be found here.
Here is a close-up of my colored image.
Lift Off is colored with my Copic Markers, and usually I leave the background black, or a bit shaded, but this time I decided to color the whole background. For that, I used a Nestabilities die to cut my image, and colored the full background with my B99 marker. I wasn't worried about being precise. After coloring I used some Distress Ink Faded Jeans to go over my B99, and a tiny bit of Distress Ink Black Soot to darker it up even more. I did my background before coloring my image, because I wasn't too sure this was going to work. These are the markers I used to color my image.
Rocket: C00, C0, C2, C3, C5, C7
Flames: R27, YR27, Y17
Stars: Y15, Y17
Earth: G43, G46, B95, B97
Planet: R27, YR27, Y17, G43, G46
The papers I used are by Echo Park. I used an Avec Borderpunch on the brown paper. The sentiment is by AmyR, congratulations set. The metal stars I used are from Making Memories. The rhinestone stars are from my stash.

That was it for today, I hope you like it!
Now hop over to Drunken Stampers and join us!

Hugs, Sandra

vrijdag 17 mei 2013

Crea-Sandra's Crafty World tutorial - Stepper Card


Hello everybody,

Welcome to my very first tutorial for Robyn's Fetish!
Today I am going to show you how to make a Stepper card.


Basic Supplies
Template from Noor!Design, you can download it here (the measurements are metric, it measures
8.2 x 5.3 inches)
Scoring tool or ruler and stylus
Craft knife
Cardstock for card base
Other supplies needed to finish your card
Digital images by Robyn's Fetish
Copic Markers or other coloring medium
Kraft Card stock
Designer paper
Lace
Flatbacked pearls
Banner die
Alphabet brads, or tiny stickers
Foam squares
Adhesive


Print your template on your cardbase, or draw it on your cardbase. I drew it, because you're able to erase the lines you drew when you're finished scoring and cutting.


Score at the dash lines. I used my ScorPal to score, but didn't use the measurements on it, because they don't match.


Cut the horizontal lines.


Prefold all the scored lines. I used my bone folder to crease the folds.


Your base is finished now. It should look like this.


Erase all your pencil lines.


OR
Use Distress ink on all edges. I used Distress Ink Vintage Photo on the edges of all my papers.


Cut kraft cardstock about 1/8" smaller on each side as a mat for your designer paper. Don't adhere this to your cardbase yet, you will need this as a template for your designer paper!


Put your kraft card stock on top of your designer paper, but let the outer edges hang off about 1/8". This way your kraft card stock is slightly bigger then your designer paper, and you create a mat.


Trace the steps on your designer paper and cut it out.


Adhere the designer paper to the kraft card stock. The two main panels can be adhered to the card base, but do not adhere the 5 middle pieces to the card base.

Cut out your banners. I used a banner die by Joy!Crafts.   They fit perfectly.


Pierce holes in the middle of each banner to put your alphabet brad through.


Repeat this for every banner to make it look like this.


I used foam squares to adhere these to the middle parts, but you can also adhere them flat or put the brad to the middle parts too. 
Glue the middle parts to the card base.


I used my Copics to color the images. I used a color chart to see which colors match my designer papers.


Here are my colored images. I used the following Copic colors

W00, W0, W2, W5 for the white areas.
R81, R83, R85 for the roses and pink areas.
G43, G46 for the leafs and green areas.
After coloring I cut them out by hand.


QUICK TIP! Since I can't cut very precisely,  I always use a black marker on the outer edges of the colored image, so you don't see white edges.


Adhere the first teapot to the right panel of your card.


The teacup is popped up on foamsquares to give it more dimension. I partially adhered it over my teapot.


Adhere the other teapot to the left panel. Mine is hanging off on both edges, but since I am not going to mail this card,  it isn't a problem.


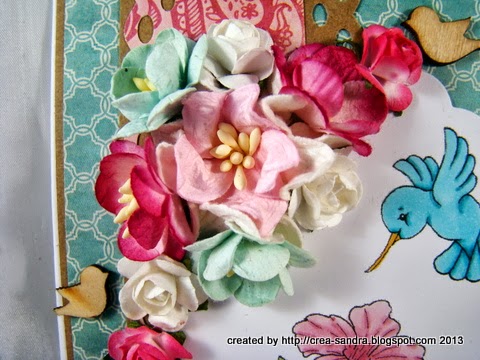
To finish my card, I used some lace on the top and some pink flat backed pearls.

This is the result.


This is it! I hope you all liked it and will try it. It is a fun folding technique and pretty easy because of the template.


Thanks for taking a look and  have a nice day!
Sandra