

This is the tutorial I made for Robyn's Fetish today!
Welcome to a new tutorial, I am going to show you how I arrange paper flowers on my cards.
Supplies
Paper flowers in different sizes. I used gardenias, cherry blossoms, lilies, roses and rosebuds.
Tim Holtz scissors
Tacky glue
Designer paper, I used My Minds Eye
Robyn's Fetish image Ms. Cutie Bear
Kraft card stock
Card base from white card stock
Distress Ink
Lace

Score and fold your card base in half
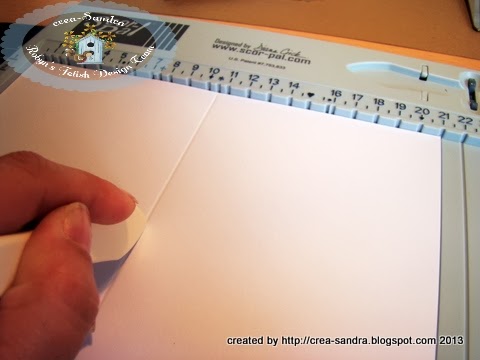
Cut a piece of kraft card stock slightly smaller than your card base. I usually cut 1/8 inch smaller

I cut 5 pieces of designer paper to cover up the kraft card stock

If you want, this is the moment to distress the edges of your papers. I like to use Distress Ink Vintage Photo for this, because the color matches the designer paper I used. After inking, you can adhere the papers to the kraft piece. Do not adhere it to the card base yet.

Cut a piece of lace and wrap it around the card front.

I always use some acid free tape to adhere my lace to the back of my card front.

Color your image and cut it out.

I used my Copic Markers to color the image and I used the following markers.
Bear: E21, E23, E25, E27
Dress: BG11, BG13, BG15
Flowers: R20, R22, R24
Stems: G43, G46

I adhered the image to a piece of kraft card stock and adhered that to the card front with dimensional adhesive. I also adhered the card front to the card base. If you adhere your flowers to the card front first, it might be hard to adhere the front to the base, so I like to glue them together now.

Pick the flowers you want to use. I usually use one big flower as a center piece, and let the size go down. That is why I started with the gardenia, because it is the biggest flower.

I always use my Tim Holtz scissors to snip the stems off my flowers. Removing them is the easiest way to adhere the flowers to your card.

Personally I like symmetry in my flower piece, so I came in with some cherry blossoms because they are a bit smaller than the gardenias. Next to the cherry blossoms I used some lilies.
While snipping the stems, I always lay the flowers down on my card so I can see what I need next.

To finish my flower piece, I like to give it some length. I used some closed rosebuds for this but you can also use some tulips for it.

I always use two rosebuds on each side, because they are a bit small. By using the stems in different lengths, you can create some more dimension to it.

When I am happy with the result I start adhering the flowers to my card. I always use Tacky Glue for it, because it dries fast and your flowers will never come loose. You don't have to use a big amount of glue, just a little dot is enough.

When adhering a flower, I like to press it down for about five seconds to make it stick really good.

Before I adhere the cherry blossoms, I like to squeeze them a bit, so there are no gaps between the gardenia and the cherry blossom.

For the lilies, I used some glue on one of the petals so they can be adhered to the card more easily.

After adhering the lily, it looks like this.

Now it's time to adhere the closed rosebuds. I like to cover the stems in glue so they stay in place.

Now you can finish the other side of the flower piece.

This is how my card looks at this moment. I think the bottom right corner looks a bit plain. I am not happy with how it looks. This shows you that you need some balance in your card and that is why I am going to add some flowers to the bottom right corner.

When creating a second flower piece, I never make it as big as the main piece. Usually I don't use more than three flowers. I lay them down first to see how it looks before adhering them.

When I am happy with the result, I adhere the flowers to the card. In this picture you can see that I didn't use two lilies. I replaced one with a little rose.

Now let me show you the result of the card.

I hope this gave you a good impression on how to arrange flowers on your card. I know there are probably a million ways to arrange them but I like this the most.
Thanks for stopping by! I hope you give it a try!
Sandra
1 opmerking:
I love your tutorial. It is great! Your card is gorgeous! Thanks for sharing. Edwina Brown
Een reactie posten